STUDENT GOOGLE ACCOUNTS
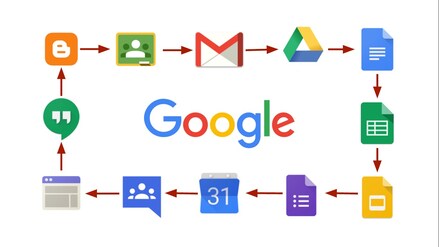
Students in Trussville City Schools are issued Google Accounts. Student Google Accounts allow students to use ChromeBooks, access Google Apps, and store and share work in their personal drives. Students can access their accounts from any computer anywhere, but knowing how to set this up may be challenging if you have never done this before. This tutorial will show you how to access your child's account and help you troubleshoot any issues you might have.
HOW TO ACCESS STUDENT ACCOUNTS AT HOME
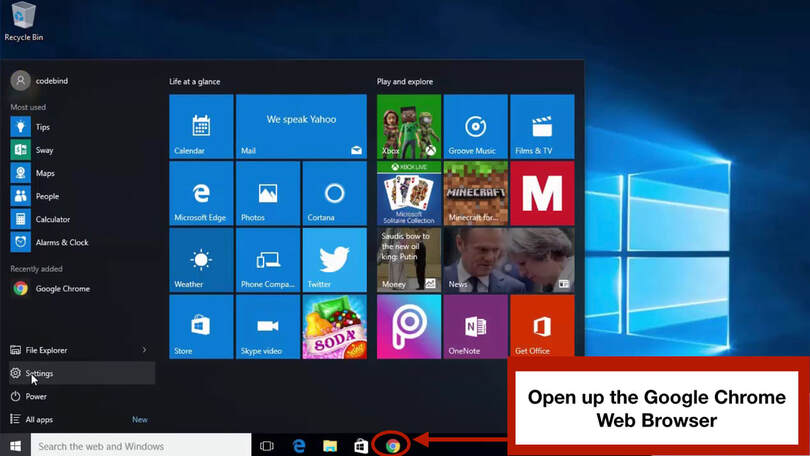
STEP 1: OPEN UP THE GOOGLE WEB BROWSER
|
Open up the Google Chrome Web Browser from your Desktop. Then go on to Step 2 below.
If you do not have the Google Chrome Web Browser, click on the button to the right. This will take you to instructions on how to download the Google Chrome Web Browser. Once you have it downloaded, come back to this page and go to Step 2. |
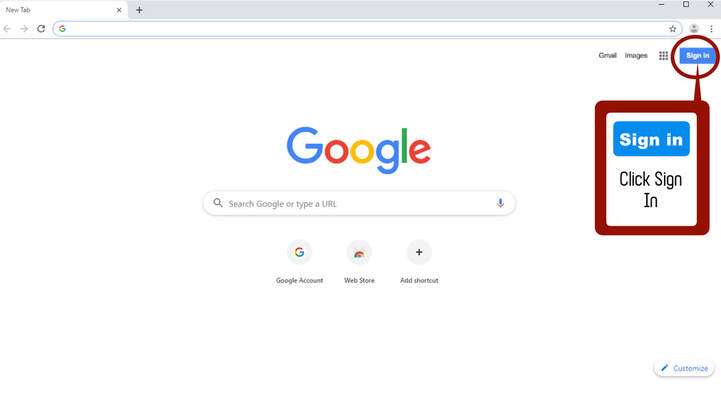
STEP 2: CLICK ON SIGN IN BUTTON
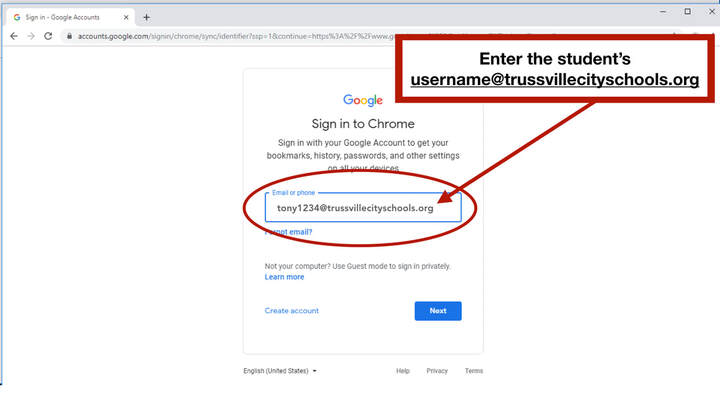
STEP 3: ENTER THE STUDENT'S GOOGLE EMAIL
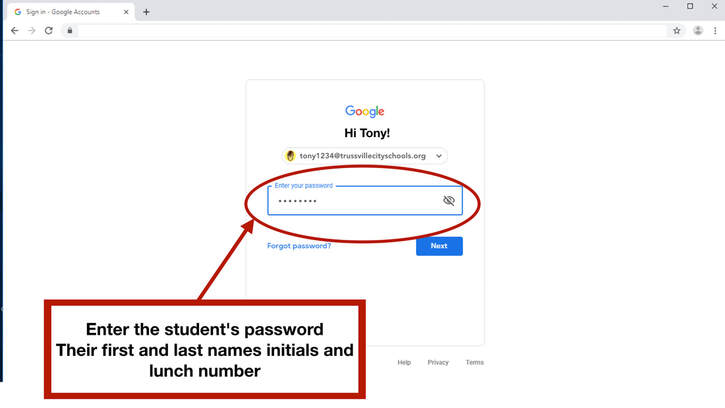
Student usernames and passwords are located in the front cover of their agenda books. Most students have memorized these and can help you enter these in. Usernames are student first names and 4 numbers. Passwords are their first name initial, last name initial, and their lunch number. Student emails are used to set up Google Accounts and are the student's [email protected].
STEP 4: ENTER THE STUDENT'S PASSWORD
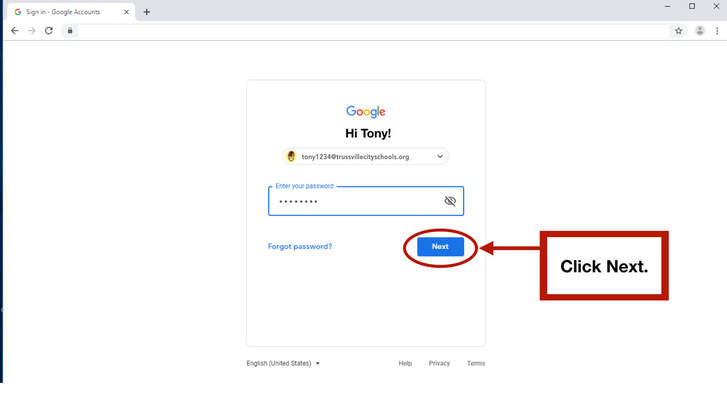
STEP 5: CLICK NEXT
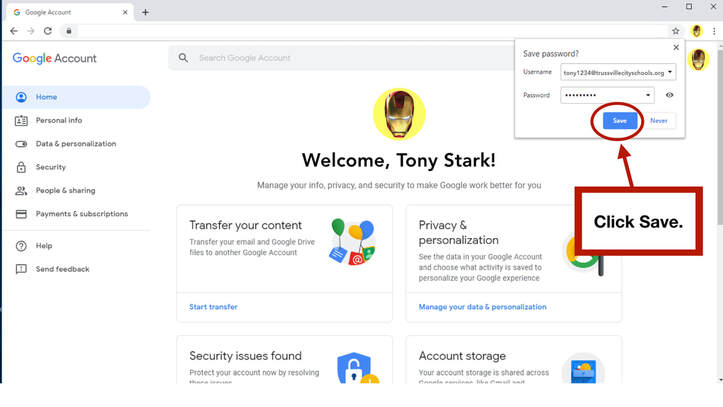
STEP 6: IF PROMPTED, SAVE PASSWORD TO YOUR COMPUTER
If your student has never signed into this computer before, you may see the screen below. Click the save button if you come to this screen. If your student has signed in before on this computer, you will not see this screen. Continue to scroll through the following images until you come to what you see on your screen for further instructions.
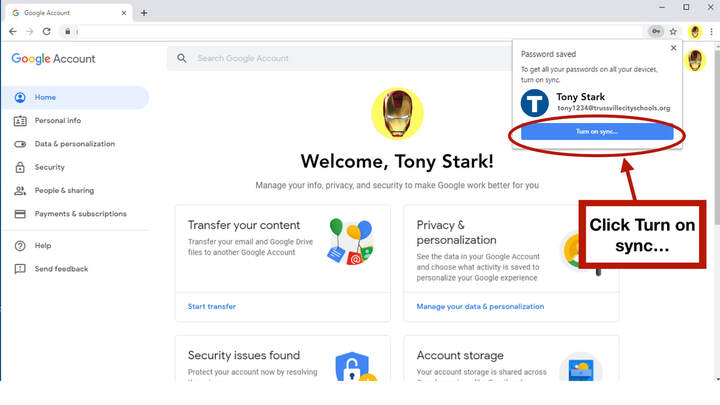
STEP 7: IF PROMPTED, CLICK TURN ON SYNC
If your student has never signed into this computer before or has but did not sync their account, you may see the screen below. Click the turn on sync button if you come to this screen. If your student has signed in and turned on sync before on this computer, you will not see this screen. Continue to scroll through the following images until you come to what you see on your screen for further instructions.
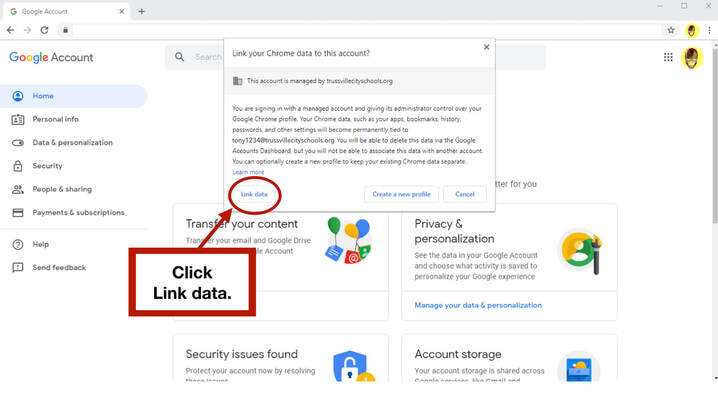
STEP 8: IF PROMPTED, CLICK LINK DATA
If your student has never signed into this computer before or has but did not link the data from their student account, you may see the screen below. Click the Link data button if you come to this screen. If your student has signed in and link the data from their student account before on this computer, you will not see this screen. Continue to scroll through the following images until you come to what you see on your screen for further instructions.
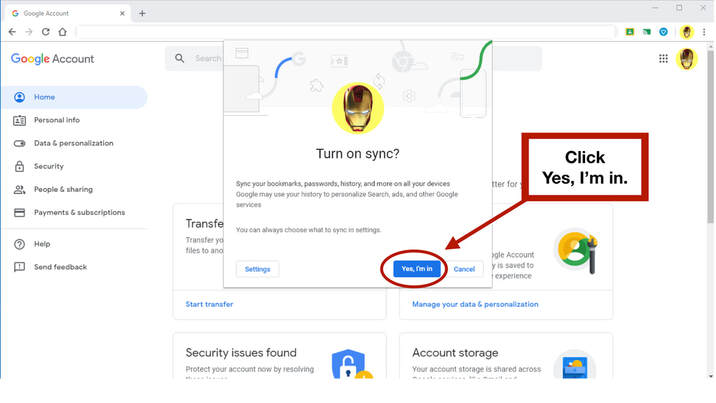
STEP 9: IF PROMPTED, CLICK YES, I'M IN, TO TURN ON SYNC
If your student has never signed into this computer before or has but did confirm that they wanted to sync their account, you may see the screen below. Click the Yes, I'm in button if you come to this screen. If your student has signed in and confirmed that they wanted to sync their account before on this computer, you will not see this screen. Continue to scroll through the following images until you come to what you see on your screen for further instructions.
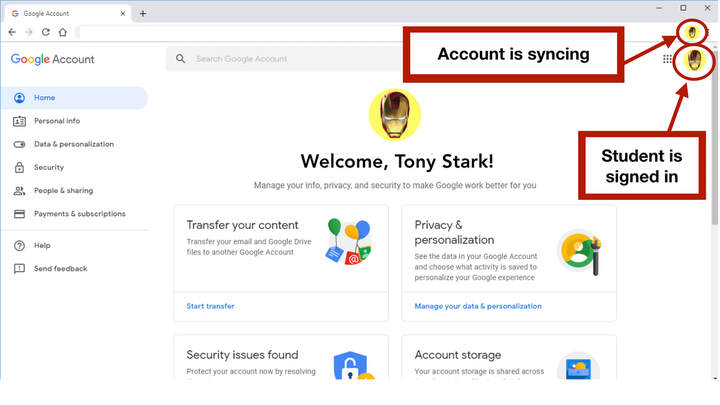
STEP 10: YOUR CHILD IS NOW SIGNED IN AND READY TO GO
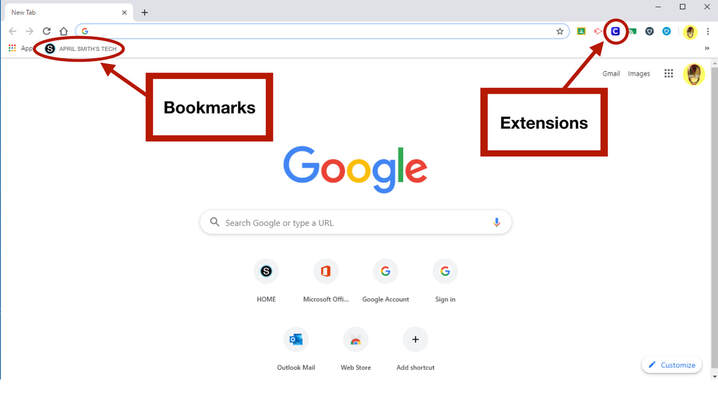
NOTICE STUDENT BOOKMARKS AND EXTENSIONS ARE SYNCING
|
NEED TO SET UP MORE STUDENTS?
|
NEED TO KNOW HOW TO GET TO THE CLEVER DASHBOARD?
|
|
If you need to set up other student accounts on this computer, click on the Set Up Multiple Student Google Accounts button below.
|
If you have set up your student and do not need to set up multiple accounts, click on the Clever Dashboard button below.
|
