SET UP ANOTHER STUDENT ACCOUNT ON YOUR COMPUTER
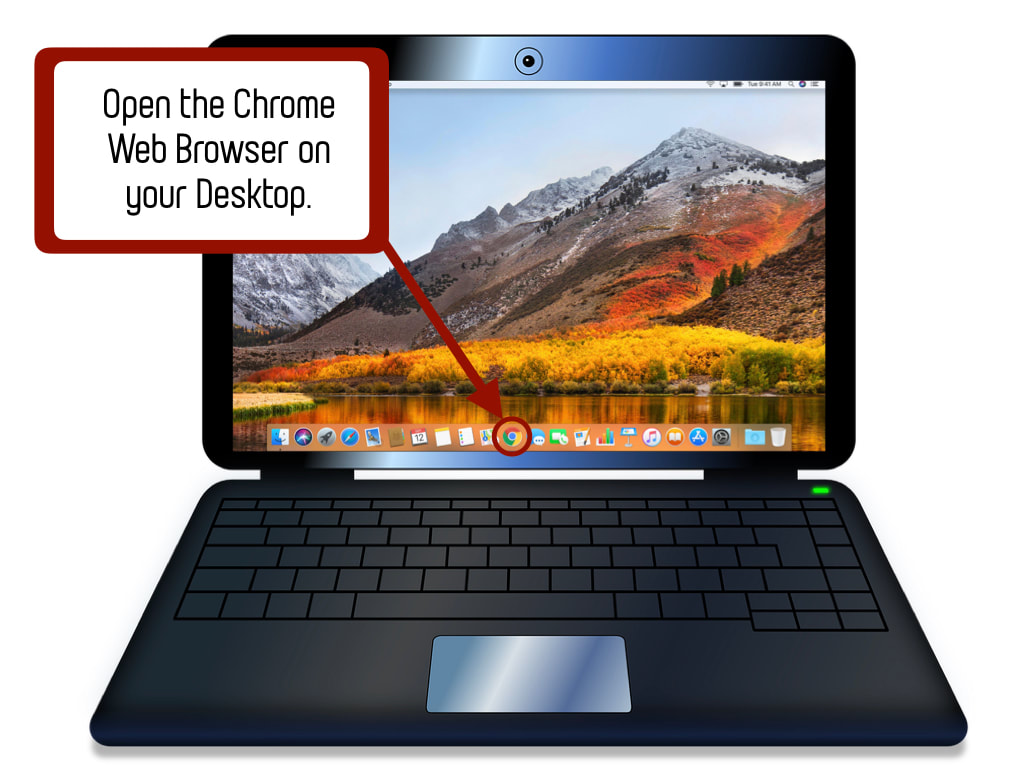
STEP 1: OPEN UP THE GOOGLE WEB BROWSER
|
Open up the Google Chrome Web Browser from your Desktop. Then go on to Step 2 below.
If you do not have the Google Chrome Web Browser, click on the button to the right. This will take you to instructions on how to download the Google Chrome Web Browser. Once you have it downloaded, come back to this page and go to Step 2. |
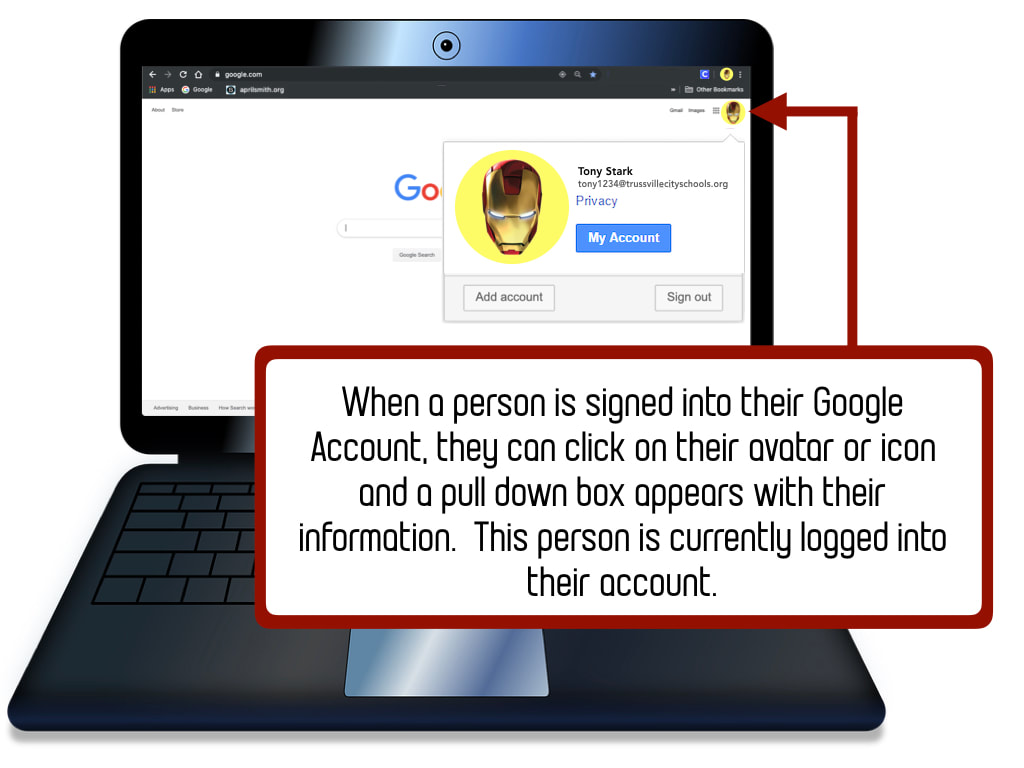
STEP 2: CLICK ON THE AVATAR
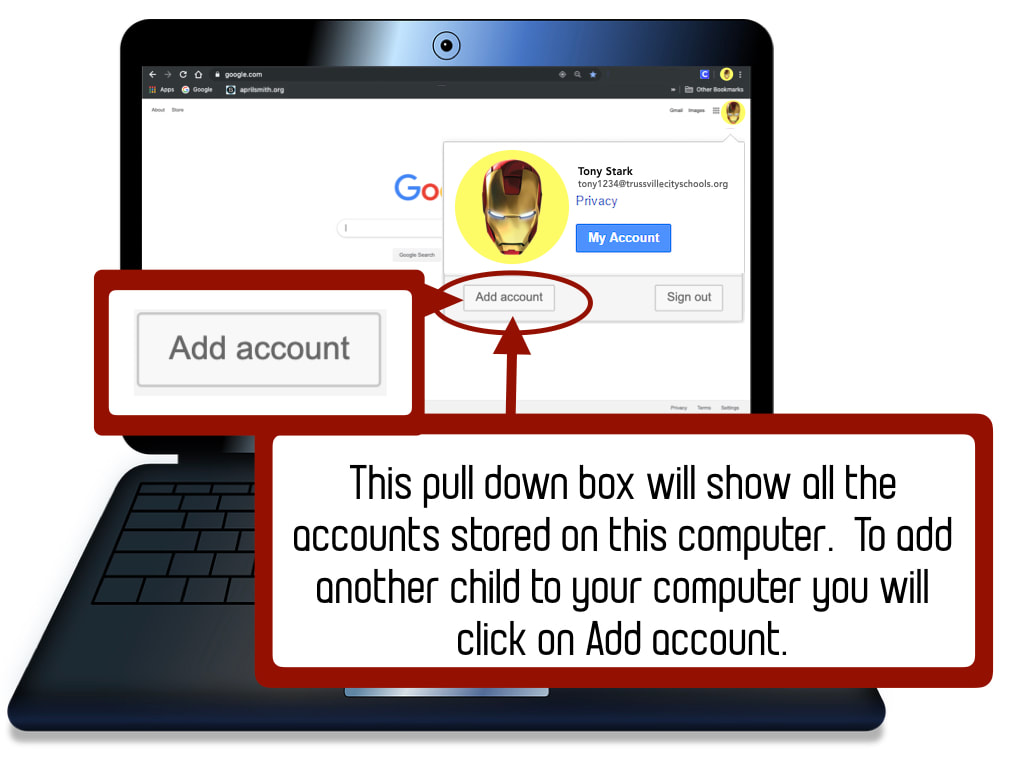
STEP 3: CLICK ON ADD ACCOUNT
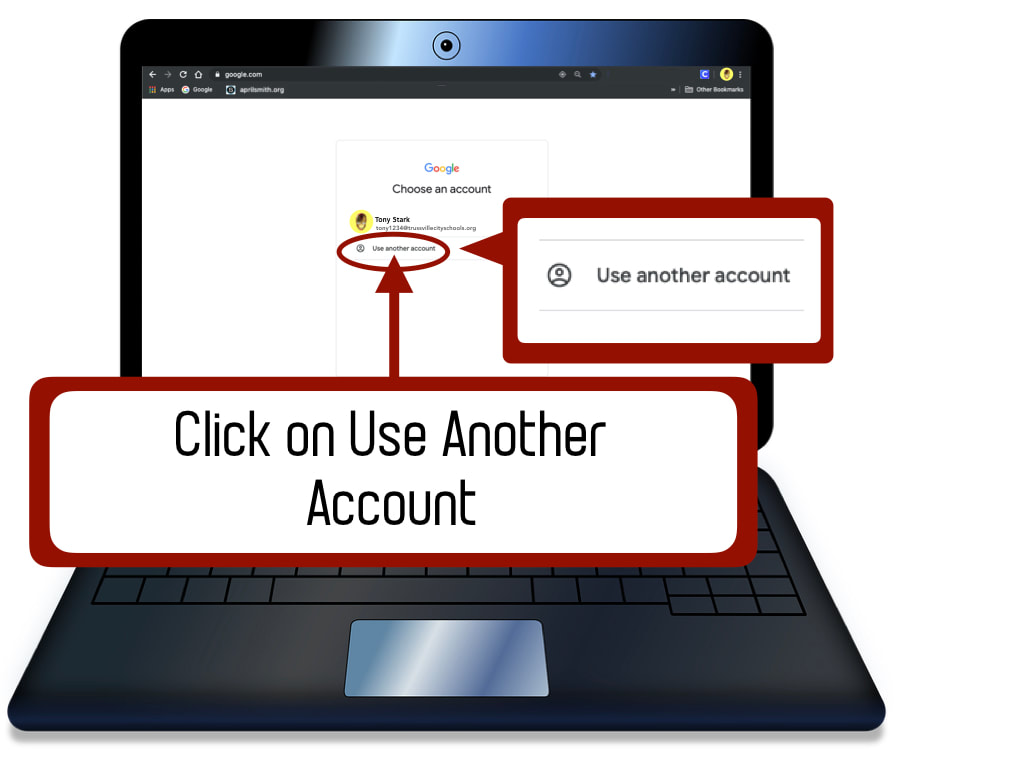
STEP 4: CLICK ON CHOOSE ANOTHER ACCOUNT
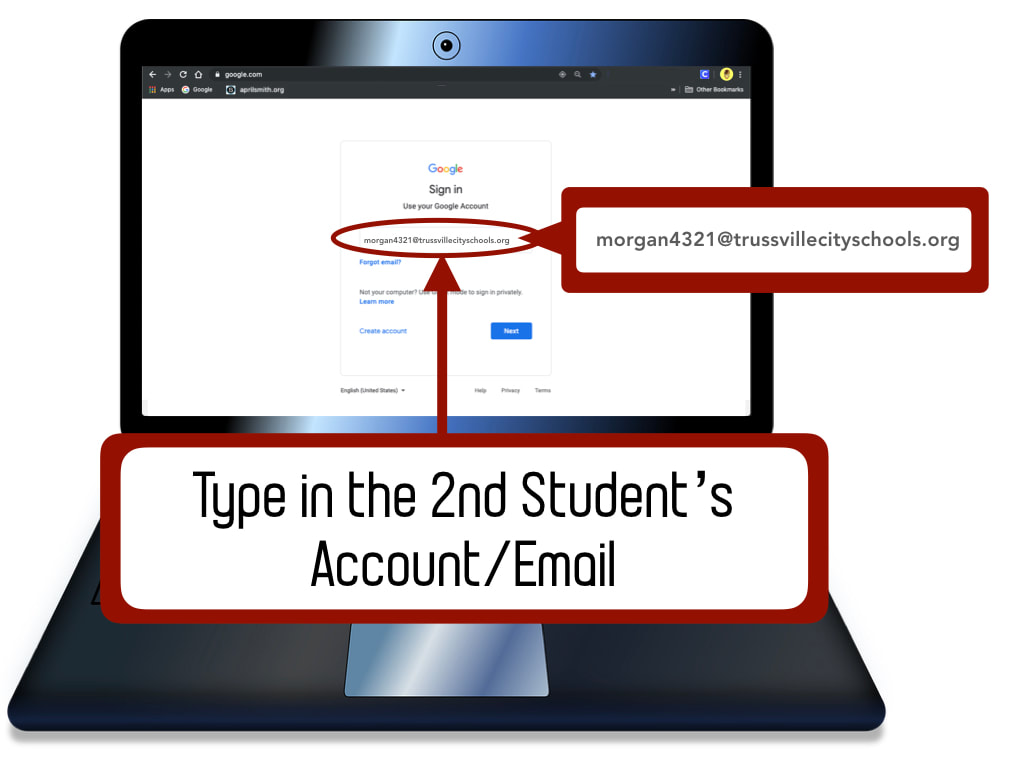
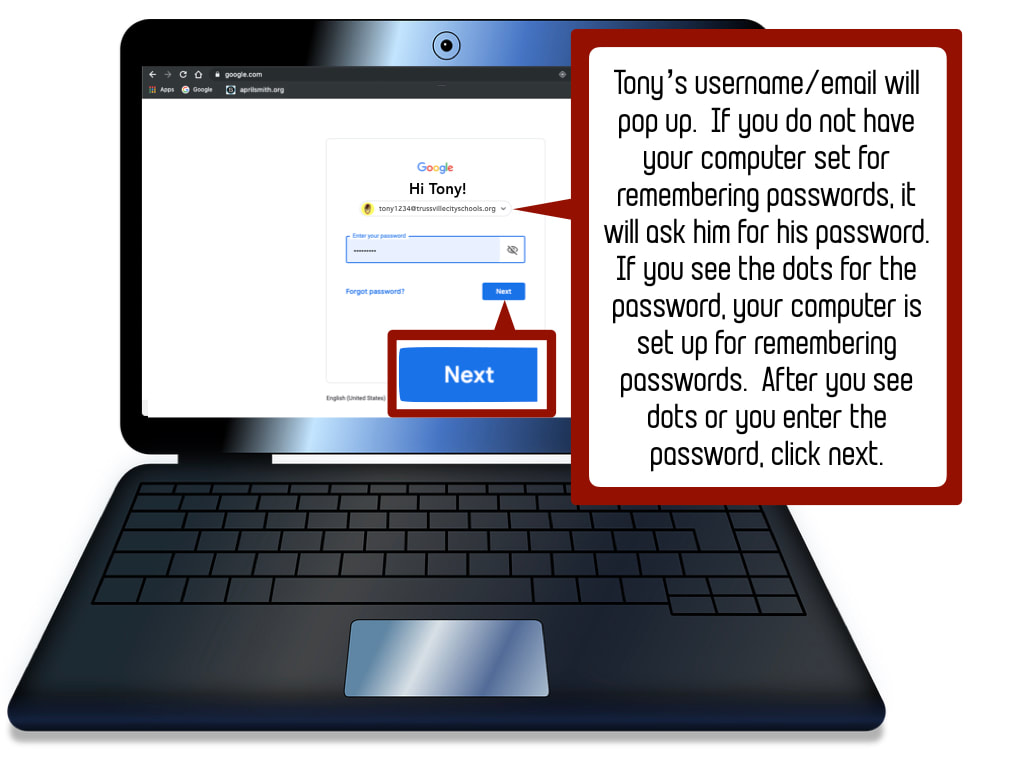
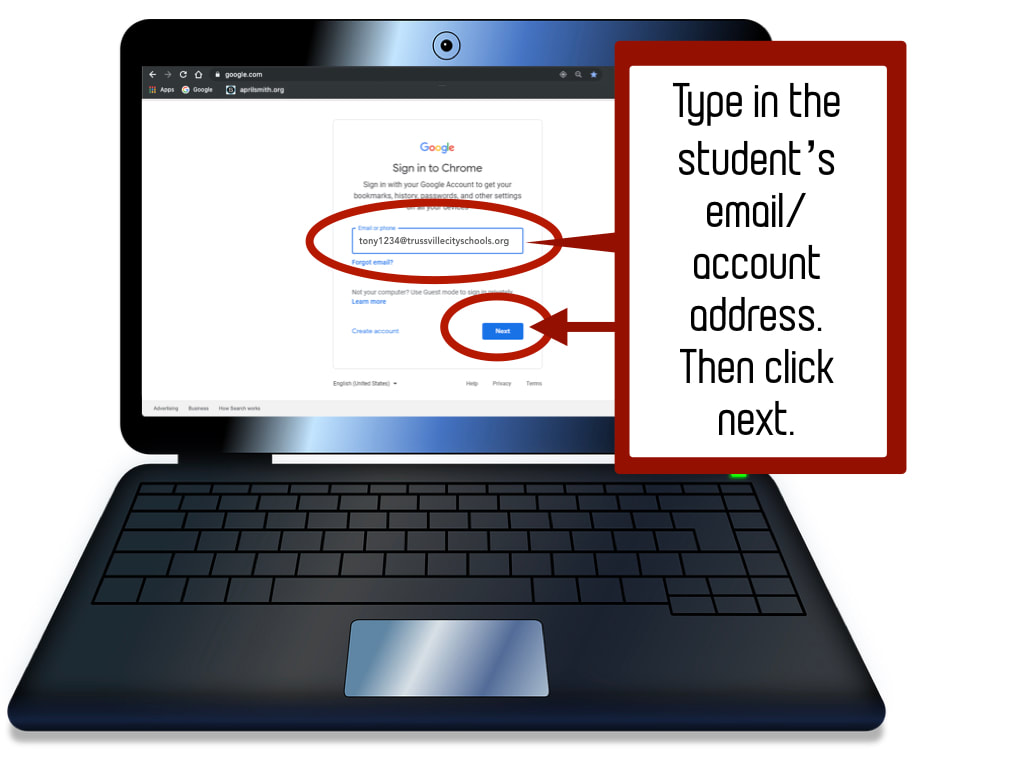
STEP 5: PUT IN THE SECOND CHILD'S EMAIL/ACCOUNT ADDRESS
Remember usernames are the student's first name with four numbers and ends with @trussvillecityschools.org.
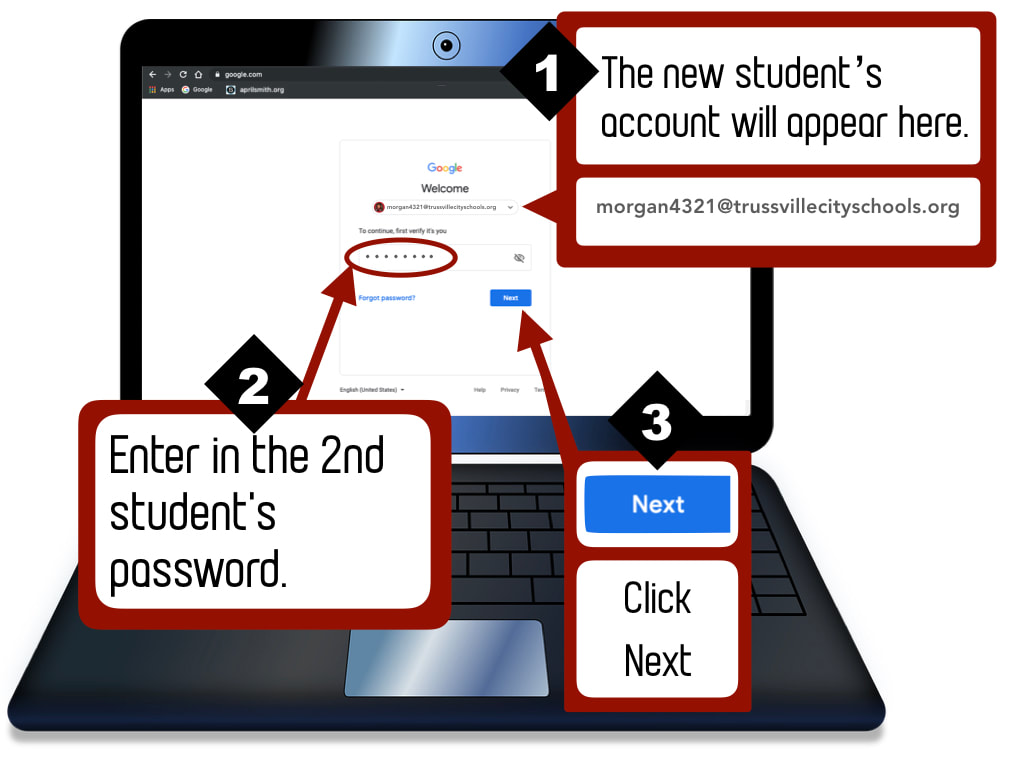
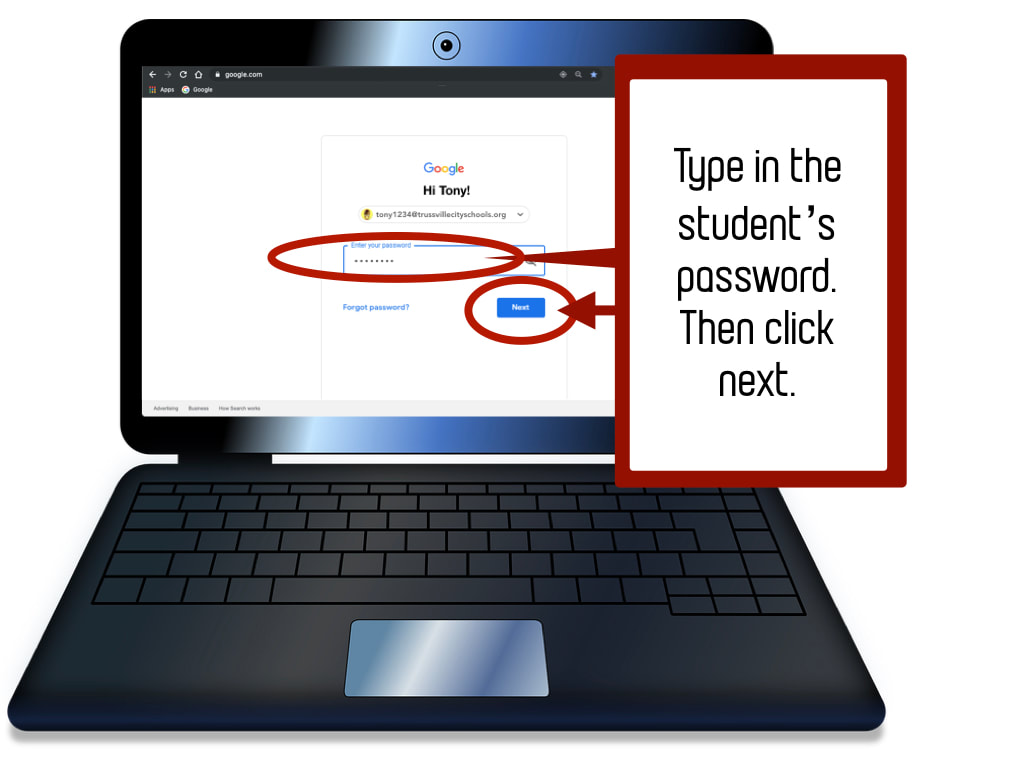
STEP 6: PUT IN THE SECOND CHILD'S ACCOUNT PASSWORD
Remember passwords are the student's first name initial, last name initial, and lunch number.
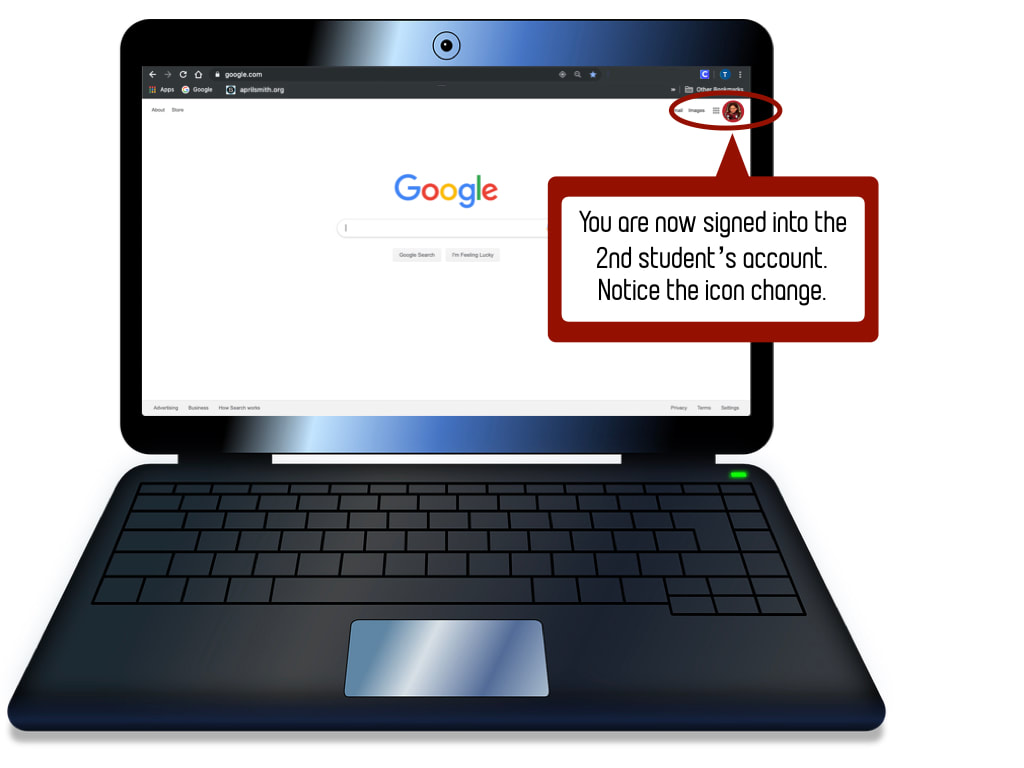
STEP 7: THE SECOND CHILD IS NOW SET UP ON THIS COMPUTER
If you have other students to set up. Repeat steps 1 - 6 for each student.
GO FROM USING ONE STUDENT ACCOUNT TO ANOTHER
STEP 8: CLICK ON THE AVATAR OF THE STUDENT SIGNED IN
If one student is signed in and another student needs to use their account, click on the avatar of the student currently logged in to see all the users on this computer.
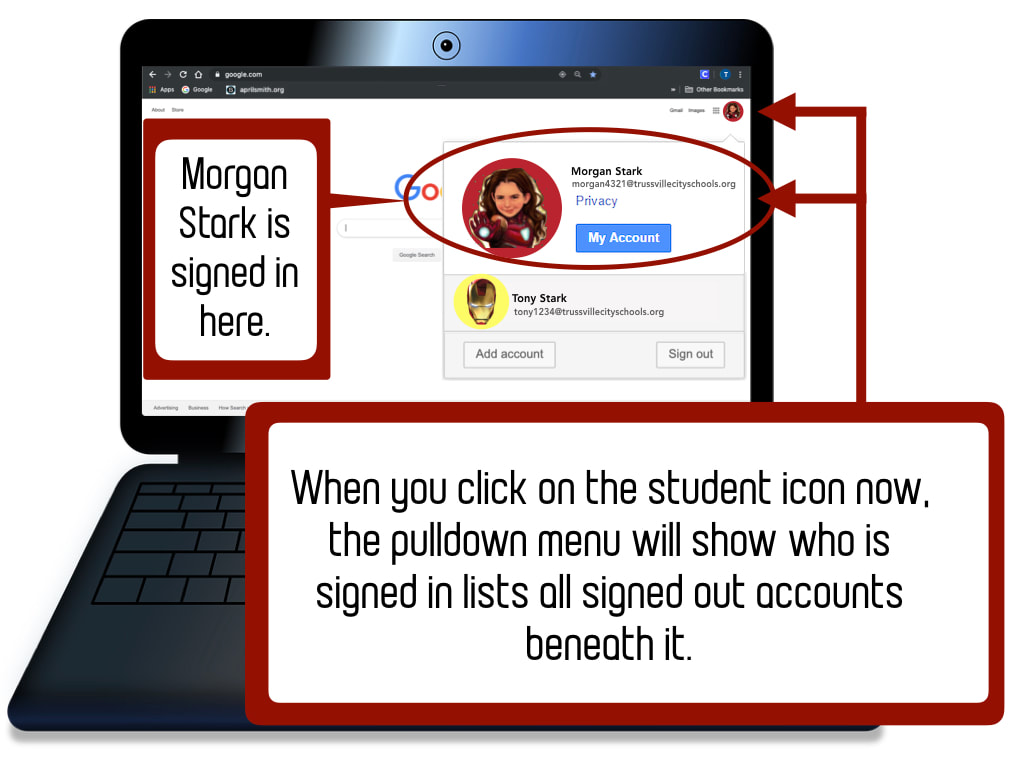
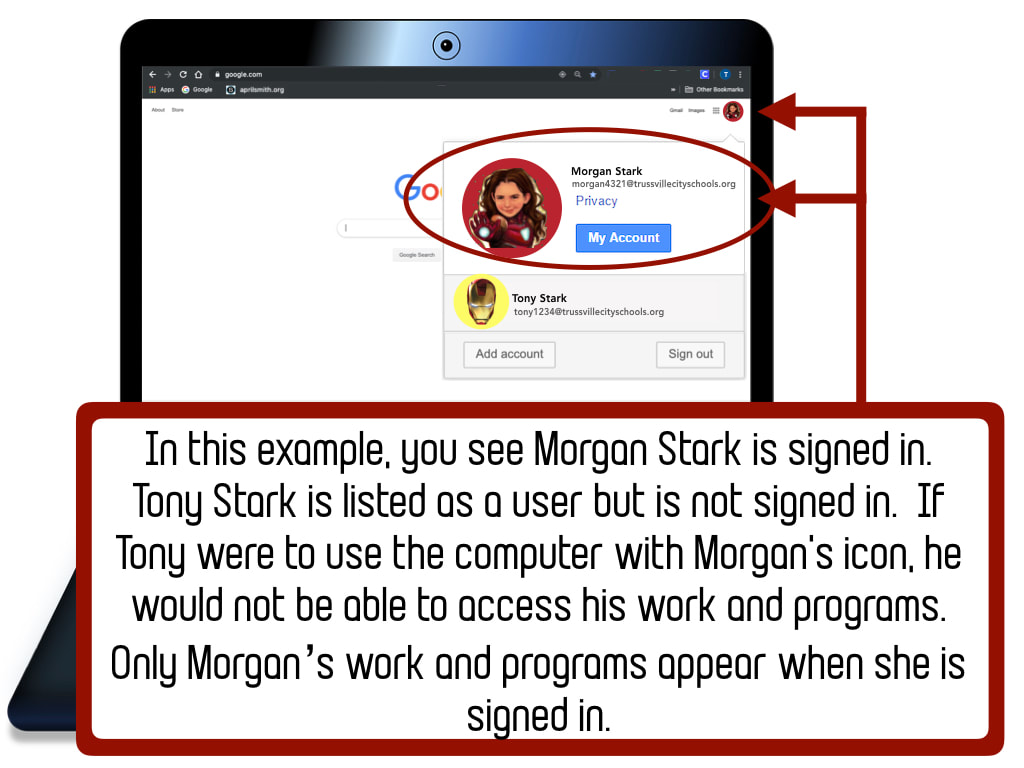
STEP 9: DETERMINE WHICH STUDENT IS CURRENTLY SIGNED IN
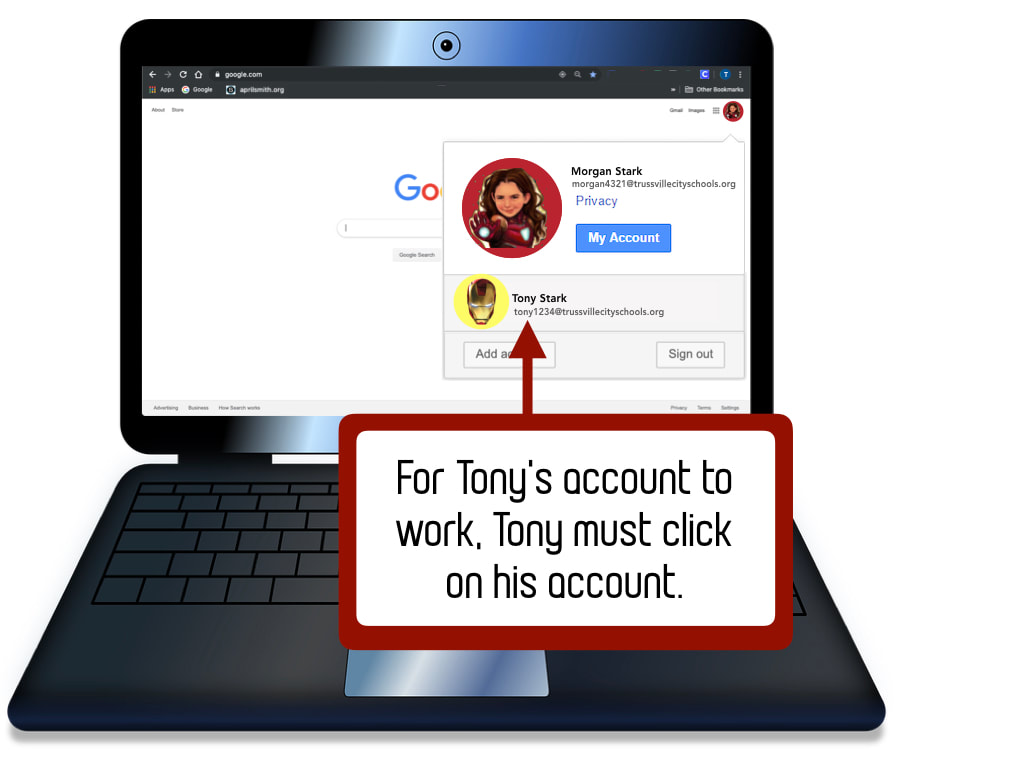
STEP 10: CLICK ON THE STUDENT WHO NEEDS TO SIGN IN
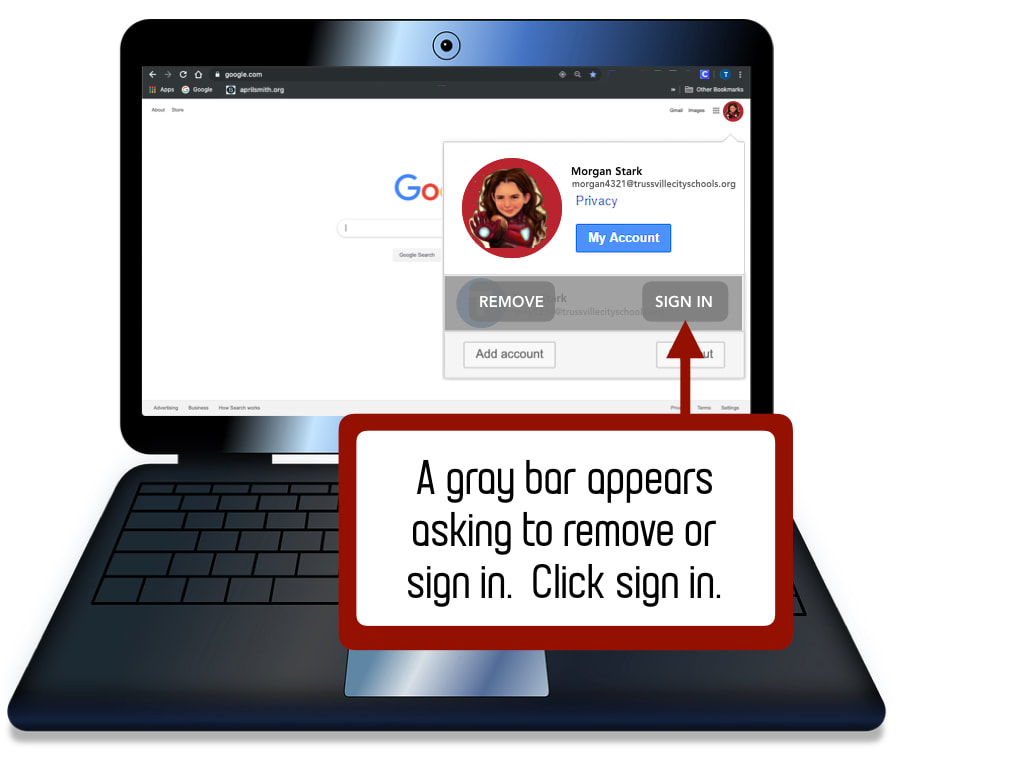
STEP 11: CLICK ON SIGN IN
STEP 12: ENTER THE STUDENT'S USERNAME AND PASSWORD
STEP 13: THE STUDENT IS SIGNED IN
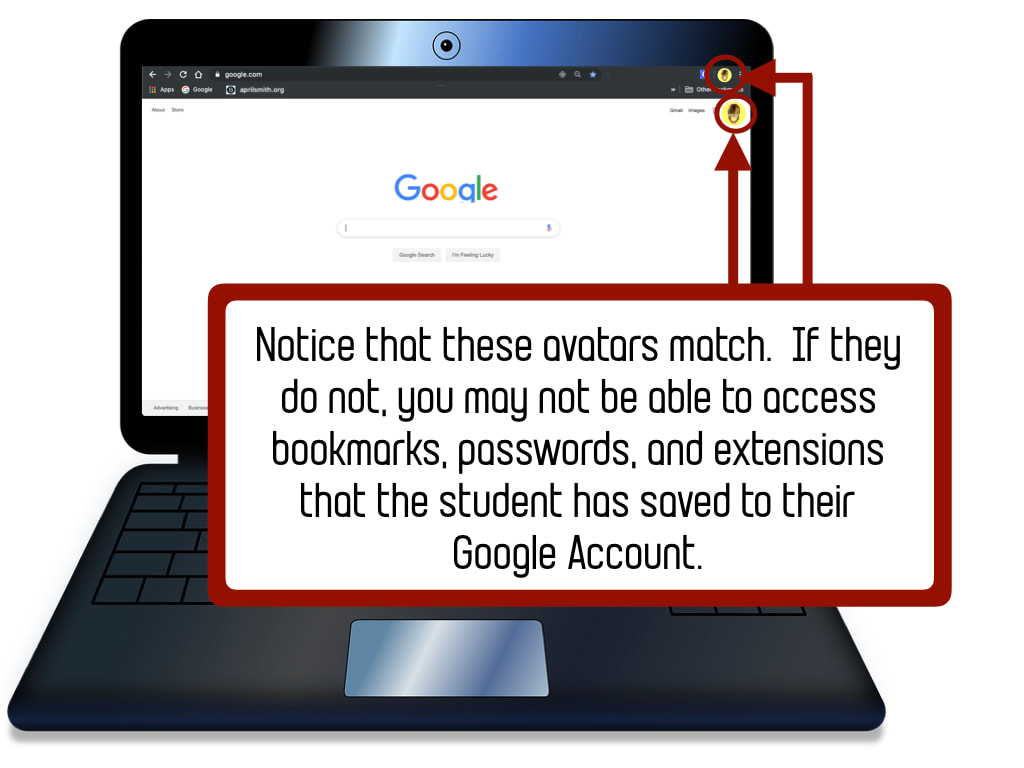
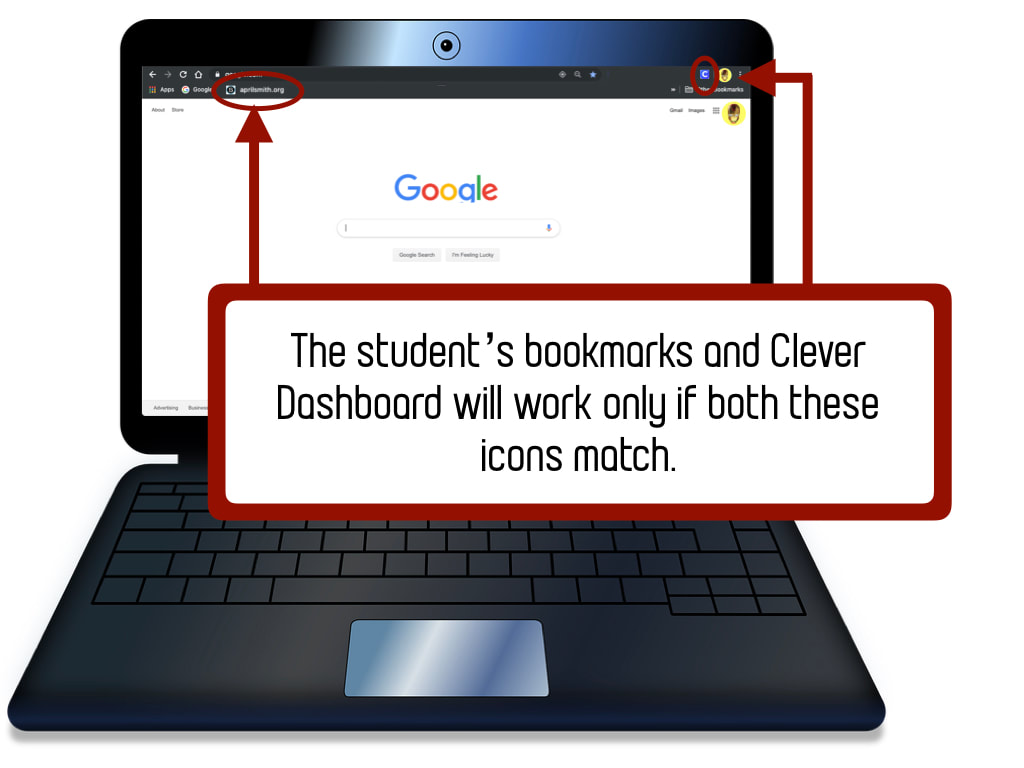
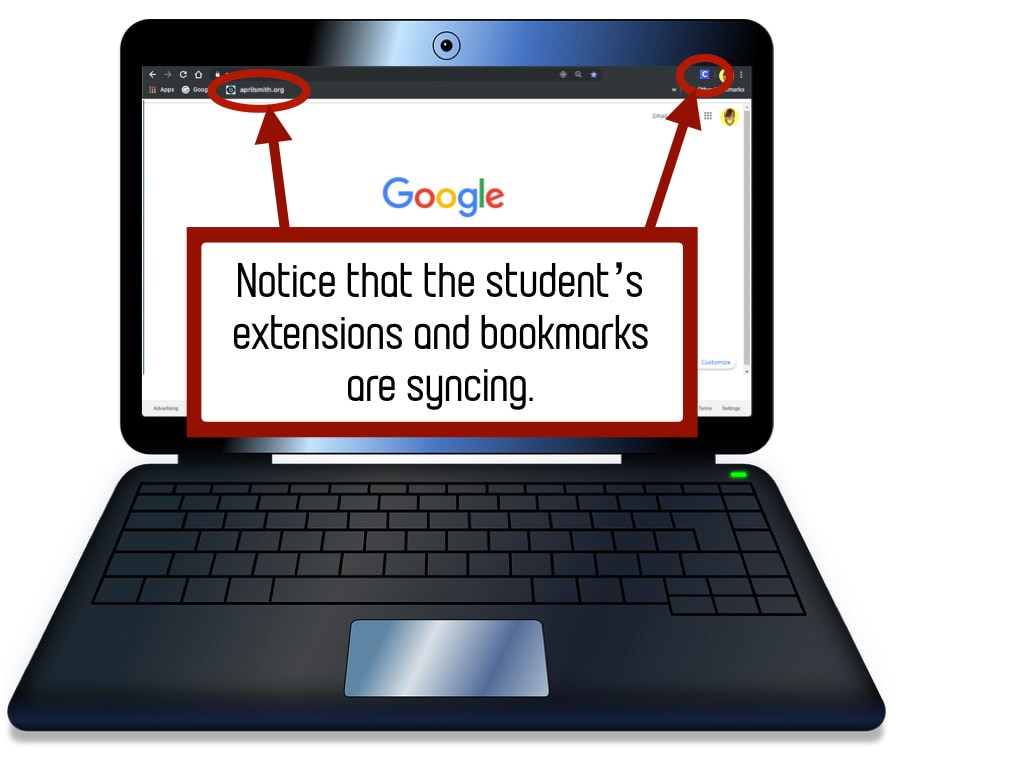
STEP 14: CHECK TO MAKE SURE THE ACCOUNT IS SYNCING
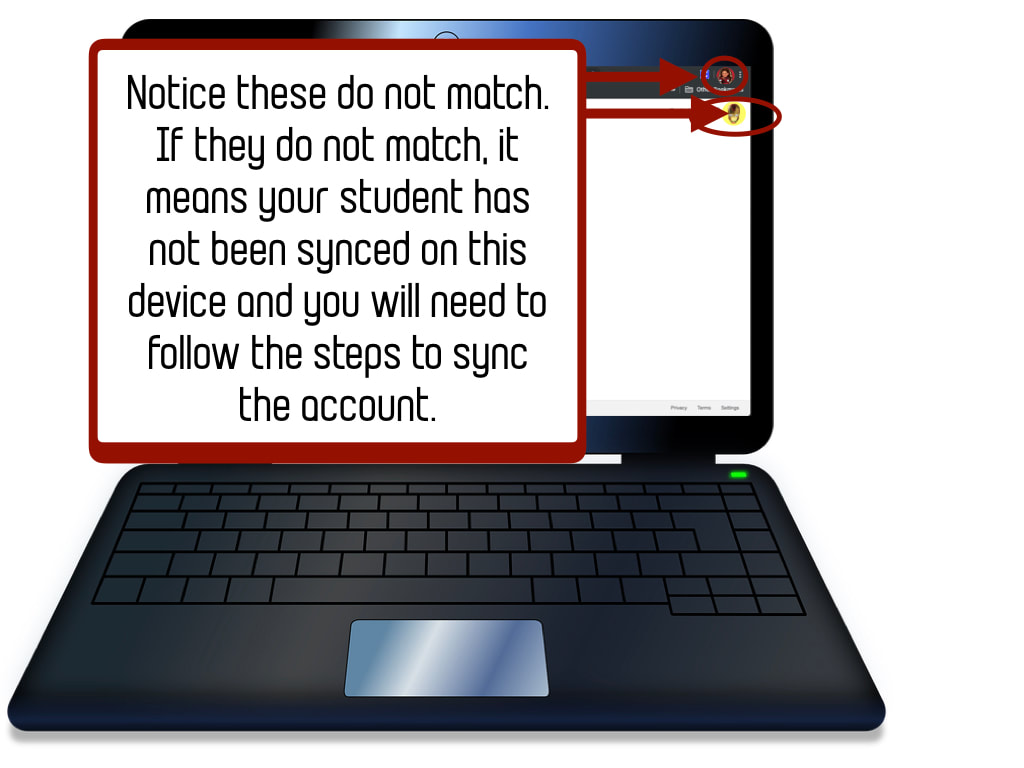
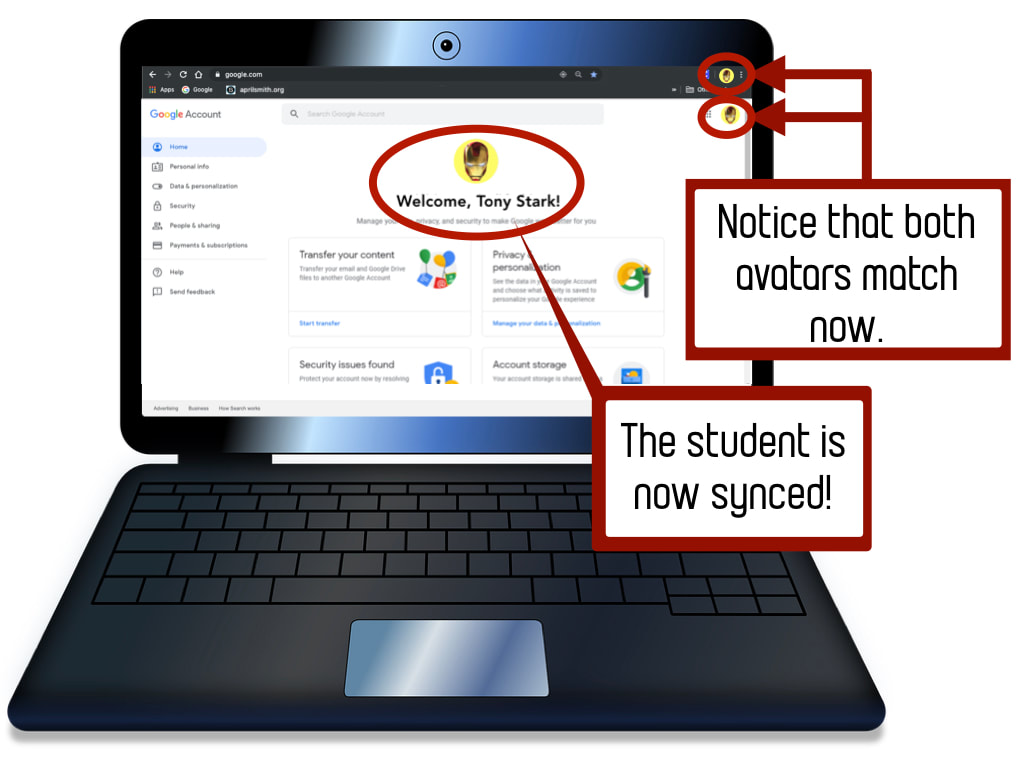
If your student's icons match and he or she sees their saved bookmarks and extensions, their account is synced and ready to go. If not, go on to step 15 to sync the account.
MAKE SURE THE ACCOUNT YOU ARE USING IS SYNCING
STEP 15: NOTICE THE STUDENT'S ACCOUNT IS NOT SYNCING
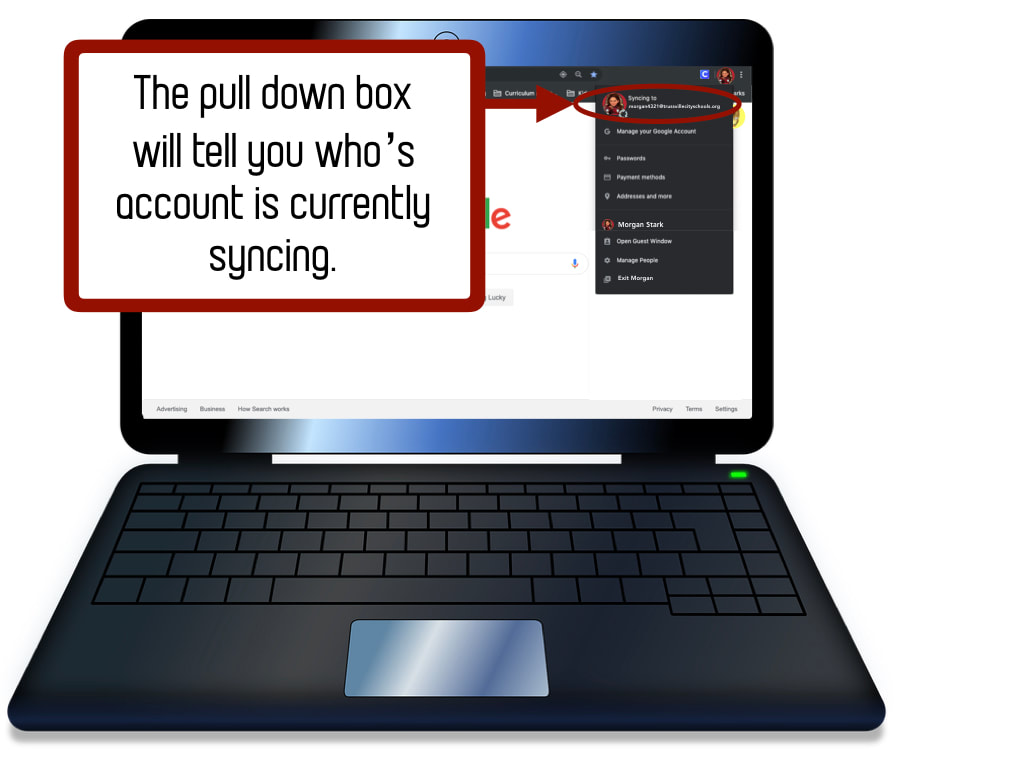
STEP 16: CLICK ON THE TOP AVATAR TO SYNC THE ACCOUNT
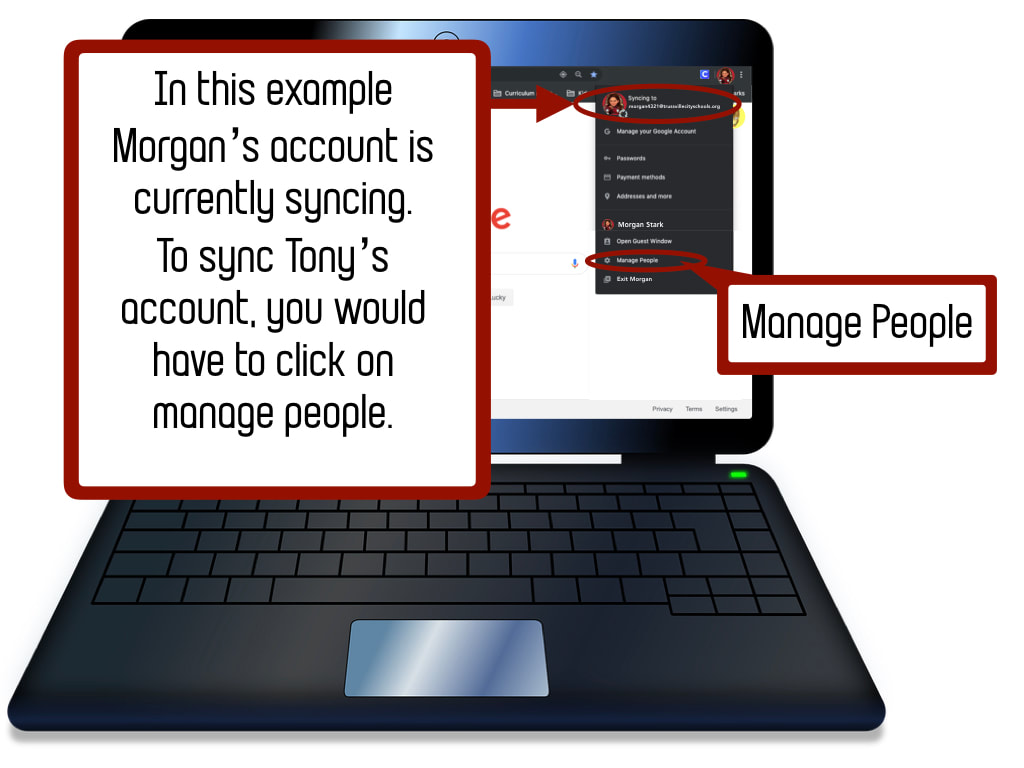
Click on the top avatar to sync the account. The pulldown box will tell you who is currently syncing. If you do not see the student's icon or name in the pull down box you will need to go to the next step. If you do, simply click on it to sync.
STEP 17: CLICK ON MANAGE PEOPLE
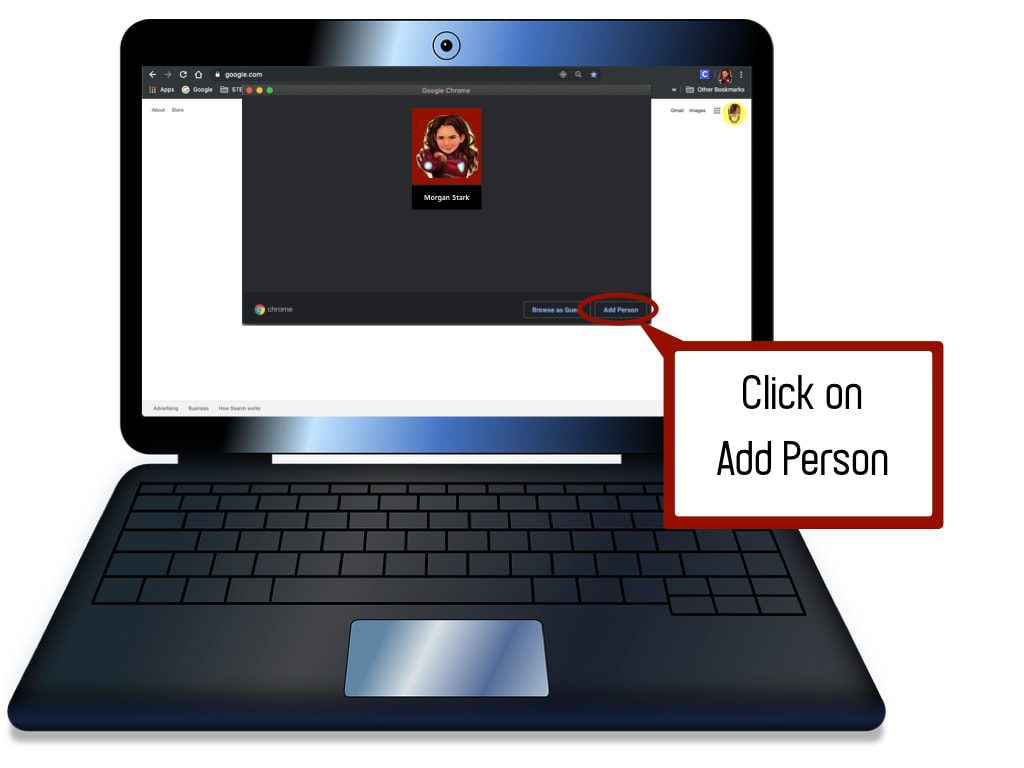
STEP 18: ADD PERSON
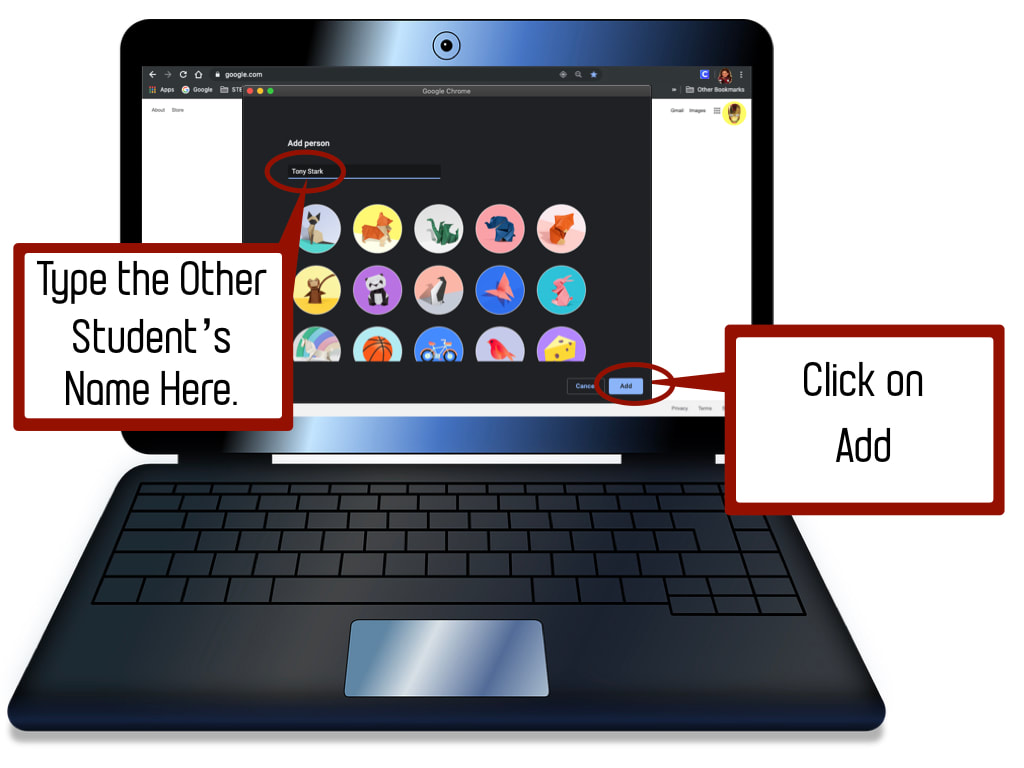
STEP 17: CREATE THE ACCOUNT TO SYNC ON THIS DEVICE
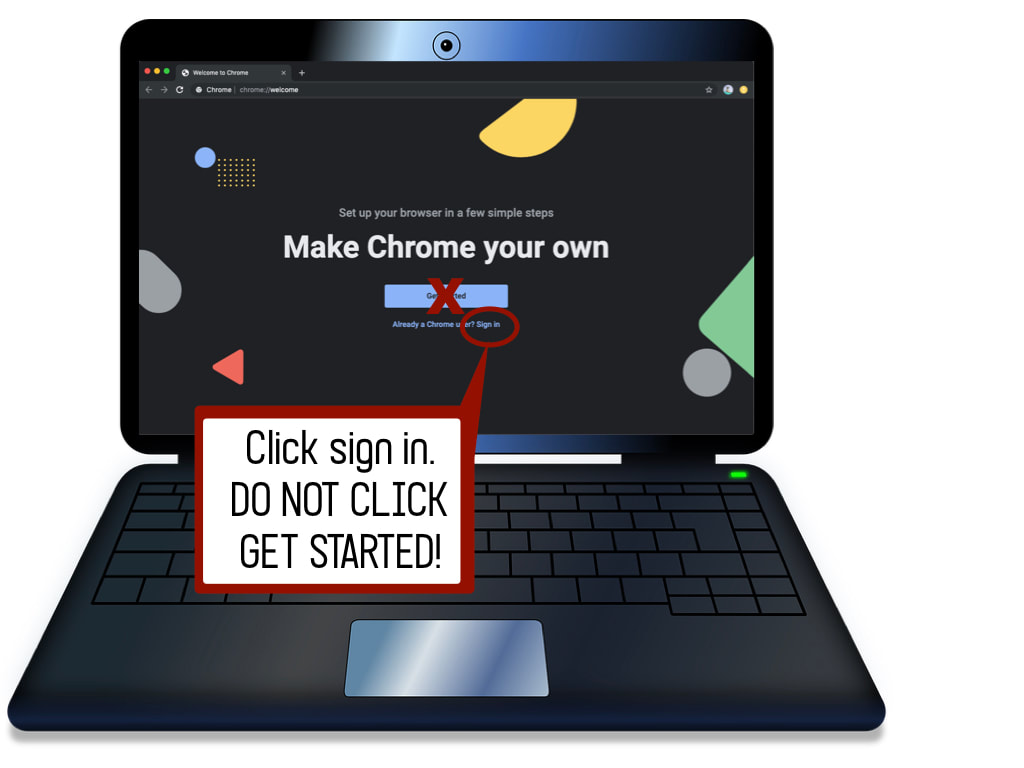
STEP 18: CLICK SIGN IN
STEP 19: ENTER THE STUDENT'S EMAIL ACCOUNT
STEP 20: ENTER IN THE STUDENT'S PASSWORD
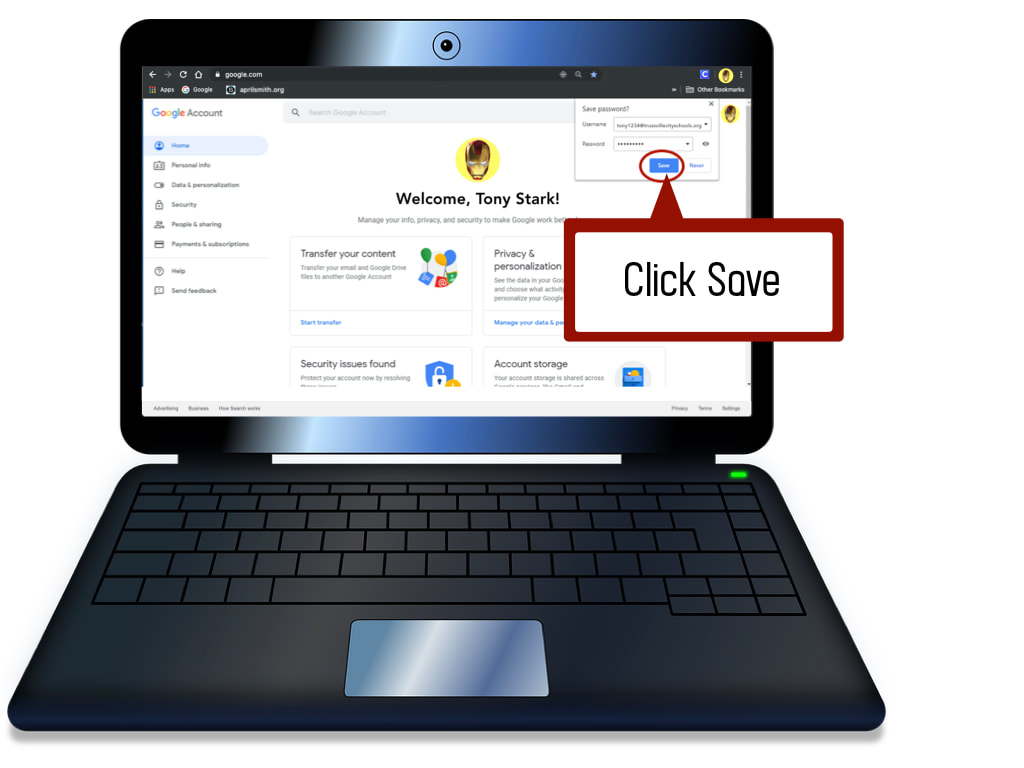
STEP 21: SAVE THE PASSWORD TO YOUR COMPUTER
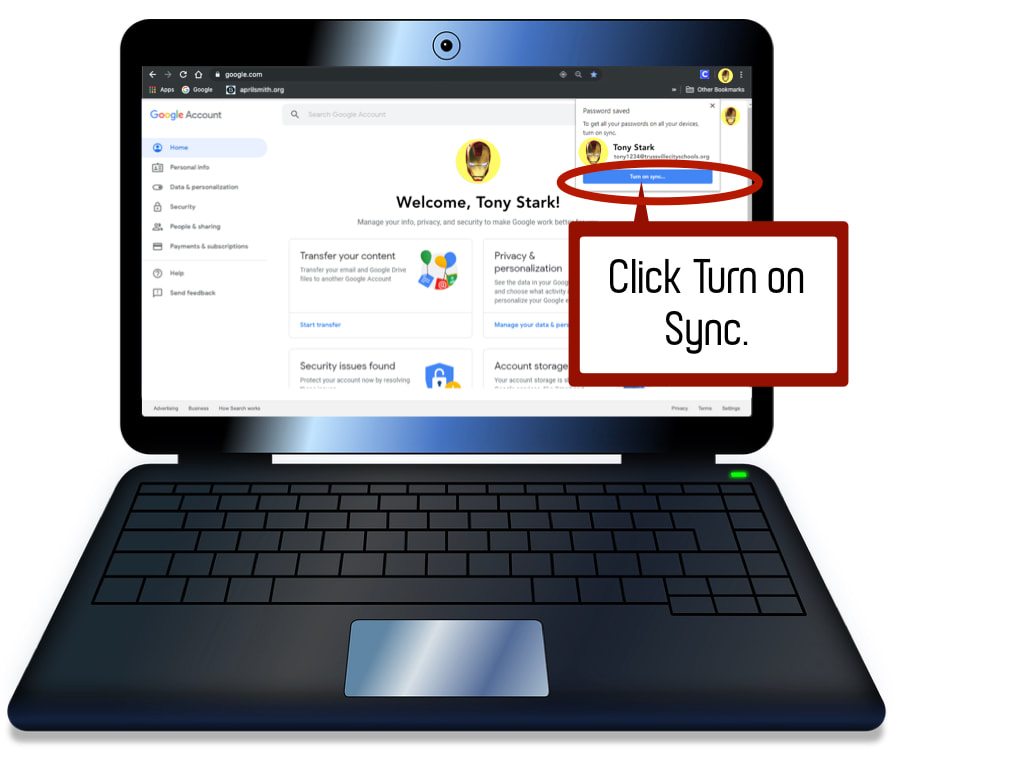
STEP 22: TURN ON SYNC
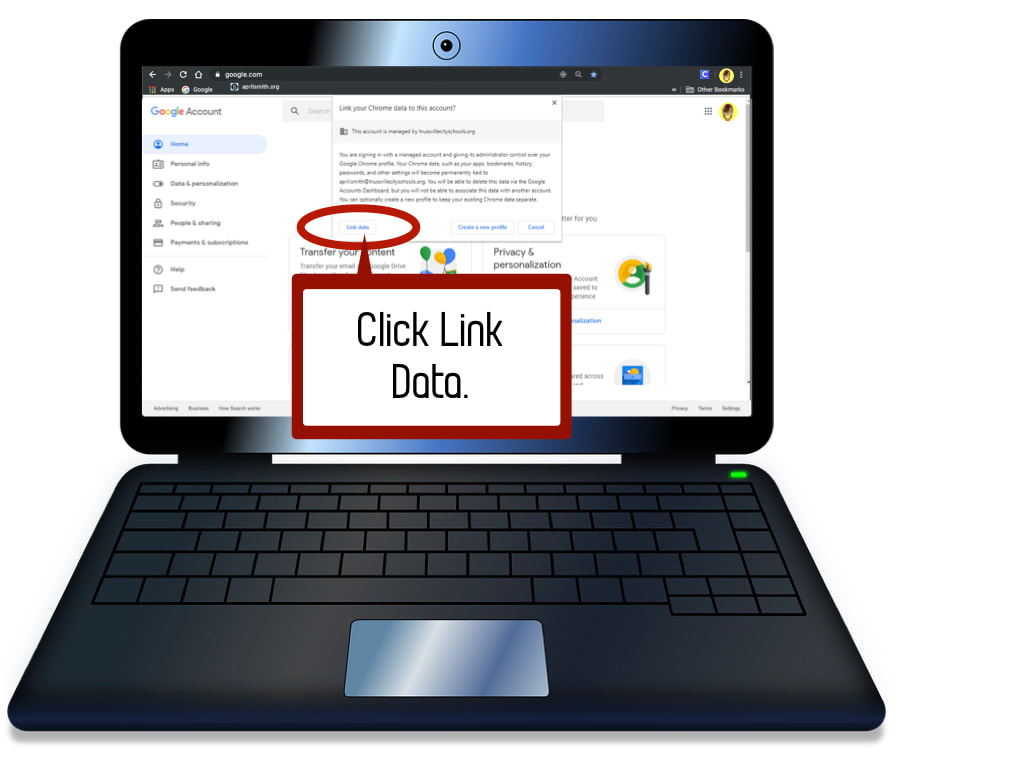
STEP 23: LINK DATA
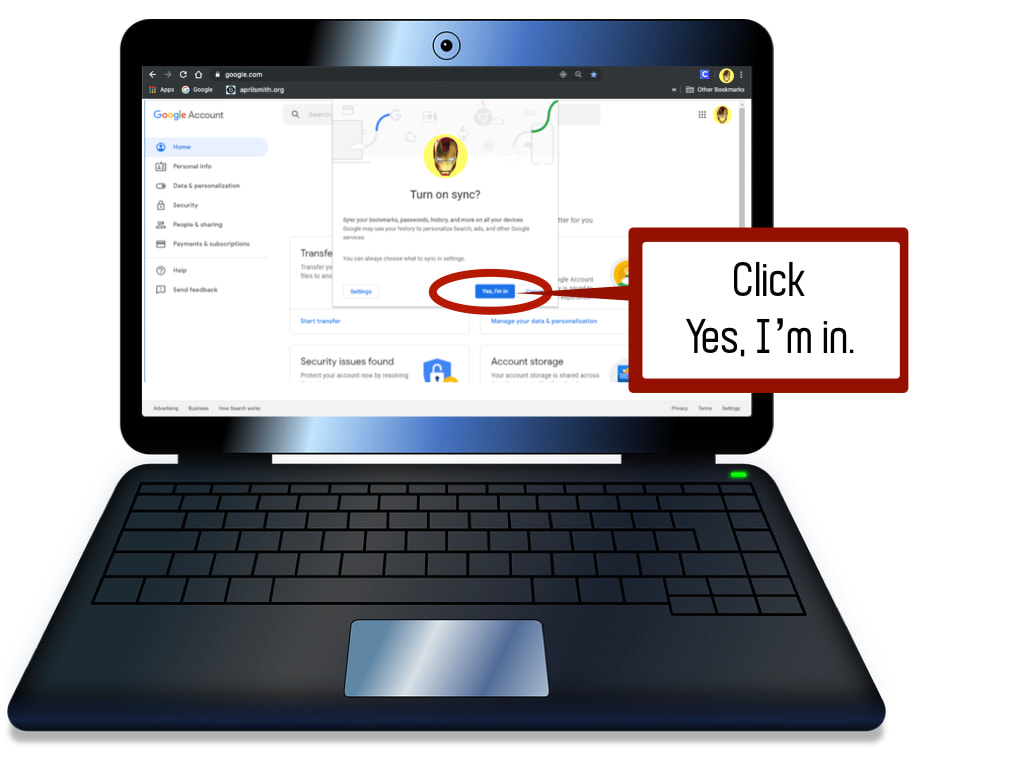
STEP 24: CLICK ON YES, I'M IN
STEP 25: THE STUDENT IS NOW SYNCED
STEP 26: LOOK FOR SAVED BOOKMARKS AND EXTENSIONS
